
How to run CUDA and OpenMP code on Google Colaboratory
Efficiently Running High-Performance Computing Code on Google Colaboratory with CUDA and OpenMP.


As a Computer Science student, I was excited to learn about the possibilities of using Google Colab's free cloud platform to run my CUDA and OpenMP code. However, when I tried to use Colab to run my CUDA and OpenMP-accelerated code, I encountered a number of challenges and obstacles. After spending countless hours searching through online forums and documentation, I was determined to find a solution. Through persistence and experimentation, I was able to successfully run my CUDA and OpenMP code on Colab and take advantage of its powerful computational capabilities. In this article, I will share the steps I took to implement this solution 👇
1. Setup Google Colab
1.1. Create a new notebook on Google Colab
To create a new notebook on Google Colab, follow these steps:
Go to colab.research.google.com in your web browser.
Sign in to your Google account if you are not already signed in.
In the top-left corner of the page, click on File and then select the "New Notebook" button.
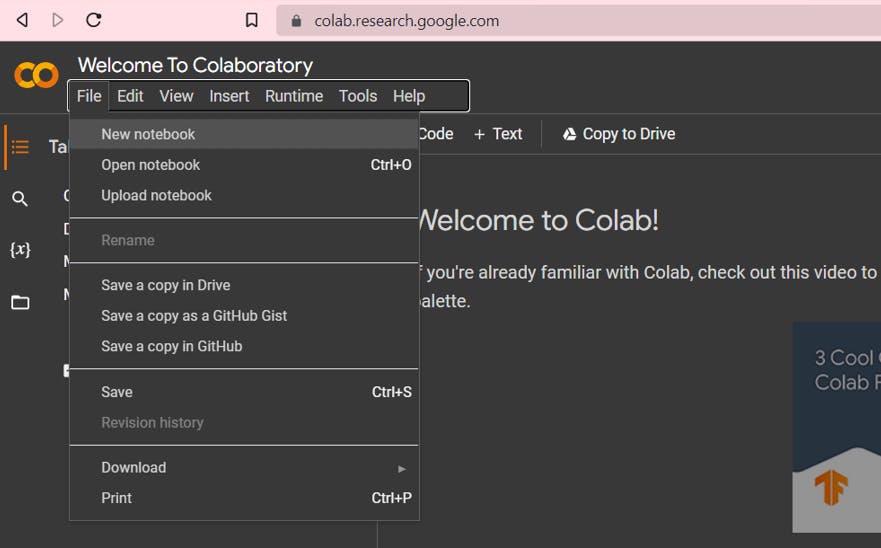
This will open a new notebook in a new tab in your web browser.
In the top-left corner of the notebook, you will see the name "Untitled0" - you can click on this to give your notebook a new, more descriptive name.
You are now ready to start using your new notebook on Google Colab.
1.2. Change the Runtime
To change the runtime in Google Colab, follow these steps:
Open the notebook that you want to change the runtime for in Google Colab.
In the top-left corner of the notebook, click on the "Runtime" dropdown menu.
From the dropdown menu, select the "Change runtime type" option.
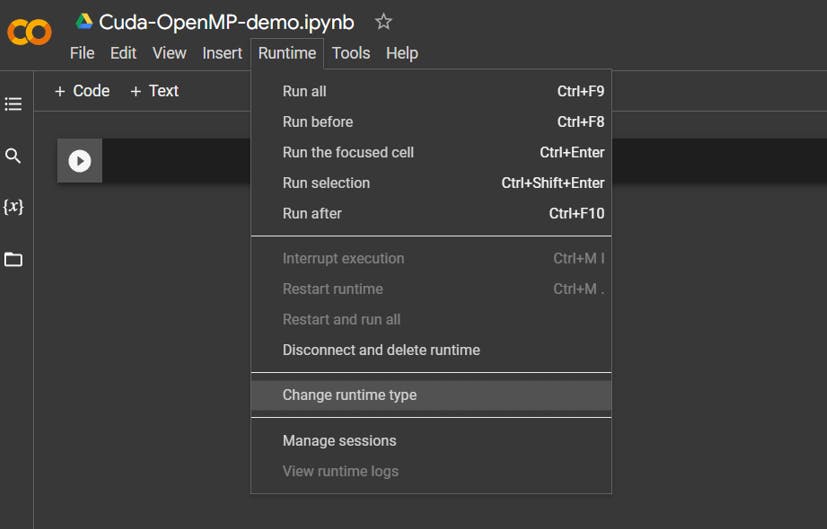
This will open the "Runtime type" pop-up window.
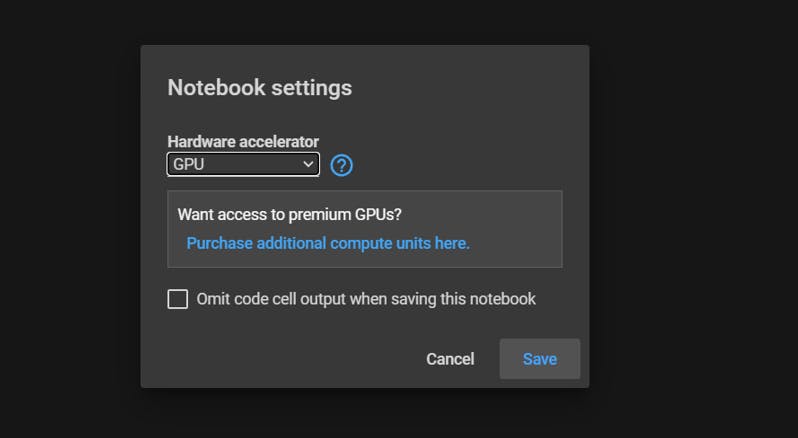
In the "Hardware accelerator" dropdown menu, select GPU.
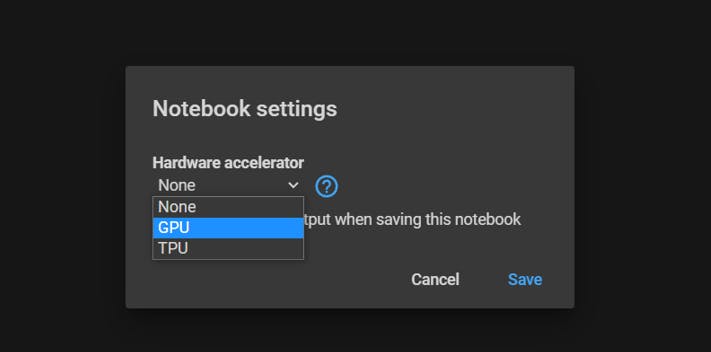
Click on the "Save" button to save your changes and apply the new runtime.
The runtime for your notebook will now be changed to the selected option.
2. Setup Cuda
2.1 Clean the instance
In a code cell, run the following command to remove all CUDA-related packages and files from the Google Colab instance:
!apt-get --purge remove cuda nvidia* libnvidia-*
!dpkg -l | grep cuda- | awk '{print $2}' | xargs -n1 dpkg --purge
!apt-get remove cuda-*
!apt autoremove
!apt-get update
2.2 Install Cuda
To install CUDA on Google Colab, in a code cell, run the following command:
!wget  --no-clobber https://developer.download.nvidia.com/compute/cuda/repos/ubuntu1804/x86_64/cuda-repo-ubuntu1804_10.0.130-1_amd64.deb
!dpkg -i cuda-repo-ubuntu1804_10.0.130-1_amd64.deb
!sudo apt-key adv --fetch-keys https://developer.download.nvidia.com/compute/cuda/repos/ubuntu1804/x86_64/7fa2af80.pub
!apt-get update
!apt-get install cuda-10-0
2.3 Check Installation
After the installation is complete, run the following command to verify that CUDA has been installed correctly:
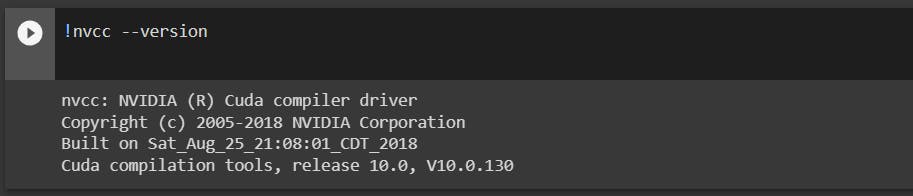
!nvcc --version
This should print the version of CUDA that has been installed on your Google Colab instance.
Output:
3. Install the NVCC plugin
3.1 What is the NVCC plugin?
The NVCC plugin is an extension that allows you to compile and run CUDA C/C++ code directly in your Google Colab notebook.
The NVCC plugin uses the NVCC (NVIDIA CUDA Compiler) command-line tool to compile and run CUDA code, providing a convenient and easy-to-use interface for writing, testing, and debugging CUDA code within the notebook environment.
Once the NVCC plugin is installed and loaded, you can use it to write and run CUDA C/C++ code in the code cells of your notebook.
The plugin will automatically compile your code using NVCC and run it on the available CUDA-capable GPU, allowing you to take advantage of the GPU's parallel processing capabilities to speed up your code.
3.2 Install the nvcc plugin
To load the NVCC plugin on Google Colab, in a code cell, run the following command to install the NVCC plugin:
!pip install git+https://github.com/andreinechaev/nvcc4jupyter.git
3.3 Load the plugin
After the installation is complete, to load the extension run the following command:
%load_ext nvcc_plugin
4. Run the CUDA program
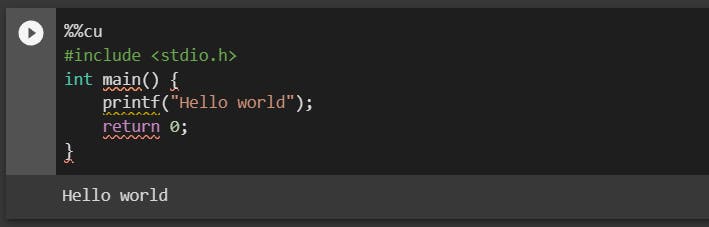
To start a CUDA code block in Google Colab, you can use the %%cu cell magic. To use this cell magic, follow these steps:
In a code cell, type
%%cuat the beginning of the first line to indicate that the code in the cell is CUDA C/C++ code.After the
%%cucell magic, you can write your CUDA C/C++ code as usual.When the code is executed, the
%%cucell magic will automatically compile the code using NVCC and run it on the available CUDA-capable GPU. The results of the code execution will be displayed in the output of the code cell.
Example:
%%cu
#include <stdio.h>
#include <stdlib.h>
int main() {
    printf("Hello world");
    return 0;
}
Output:
5. Run the OpenMP program
5.1. Write code using the %%cuda cell magic
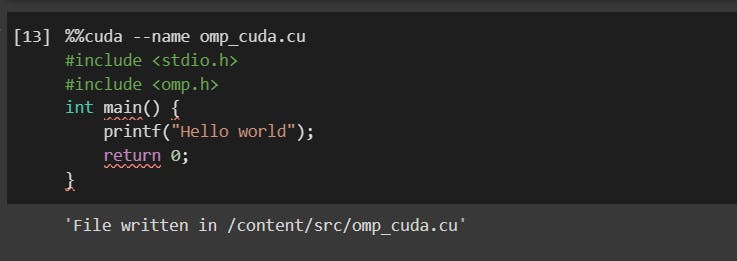
To start an OpenMP code block in Google Colab, you can use the %%cuda cell magic followed by the --name option and the name of the CUDA file that will contain your OpenMP code. To use this cell magic, follow these steps:
Open the notebook that you want to use the
%%cudacell magic in Google Colab.In a code cell, type
%%cuda --name omp_cuda.cuat the beginning of the first line to indicate that the code in the cell is CUDA C/C++ code that will be saved in a file named "omp_cuda.cu".After the
%%cudacell magic, you can write your OpenMP code as usual.
%%cuda --name omp_cuda.cu
Example:
%%cuda --name omp_cuda.cu
#include <stdio.h>
#include <omp.h>
int main() {
    printf("Hello world");
    return 0;
}
Output:
5.2. Run the OpenMP code
To run an OpenMP code on Google Colab, in a code cell, run the following command to compile the OpenMP code using NVCC and generate an executable file:
!nvcc -Xcompiler="-fopenmp" -arch=sm_75 -o /content/src/omp_cuda /content/src/omp_cuda.cu
!/content/src/omp_cuda
The command in the first line will compile OpenMP code in the file "omp_cuda.cu" using NVCC and generate an executable file named "omp_cuda" in the content/src directory.
The
f-openmpoption indicates the code uses the OpenMP library.The
-arch=sm_75option specifies the compute capability of the GPU the code will run on.The command in the second line will run the "omp_cuda" executable file, which will in turn execute the OpenMP code on the available CUDA-capable GPU. The output of the code execution will be displayed in the output of the code cell.
Output:

That's all folks 👋
I hope this article helps you to run your CUDA and OpenMP program on Google Collab! Let's connect: